
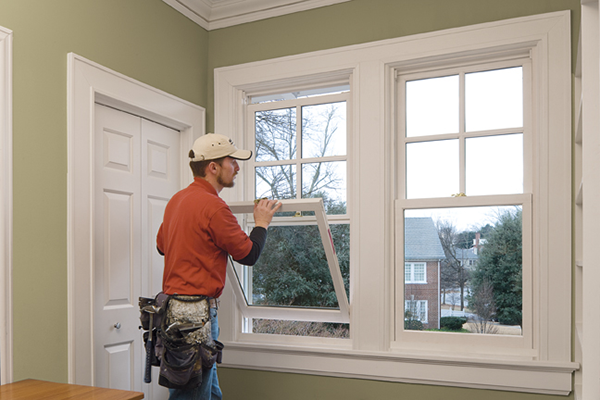
Replacement windows are installed in seven stages: the opening gets measured, the old sash and stops come out, the opening is inspected and cleaned, the new unit is set level and square on shims, it is fastened through the jambs, the perimeter is sealed and insulated, and the trim goes back on before the crew tests operation. Two methods carry that sequence, and the one your home needs depends on whether the existing frame is still sound. This walkthrough covers both methods, the measuring rules that decide fit, what happens on installation day, how the perimeter gets sealed, and how you can check the finished work yourself.
How Are Replacement Windows Installed?
Replacement windows are installed by fitting a new, custom-sized unit into an opening that already exists in your wall. The full sequence runs measure, remove, prepare, set, fasten, seal, and finish. Each stage feeds the next, and skipping one shows up later as a draft, a sticking sash, or a leak at the sill.
The reason the sequence matters so much comes down to energy. The U.S. Department of Energy reports that heat gain and heat loss through windows accounts for 25 to 30 percent of residential heating and cooling energy use, and that heating and cooling represents 56 percent of energy use in a typical American home. Heating and cooling that large means a poorly sealed perimeter costs you money every month of the year.
The perimeter is also the part homeowners never see. A window carries a rating from the factory, but that rating assumes the unit was set square and sealed correctly. We install replacement windows to the same sequence on every job because the sequence is what turns a factory rating into real performance in your wall.
What Is the Difference Between Insert and Full-Frame Window Replacement?
The difference between insert and full-frame window replacement is how much of the old window comes out. An insert replacement keeps the existing frame and drops a new unit inside it, while a full-frame replacement tears out the entire old window down to the rough opening. Insert work is also called pocket replacement or retrofit installation.
Pocket replacement moves fast because the frame, the trim and the siding all stay put. Pella reports that a pocket or insert installation takes approximately one hour per window, and that a two-person crew can finish a typical eight to ten window home in a single day using this method. Speed like that is why insert work suits homes where the original frame is dry, square and free of decay.
Decay changes the answer completely. A frame with soft wood, water staining or an out-of-square opening cannot hold a new unit tight, so the correct call is full-frame work. Andersen states that a full-frame replacement requires at least four to six hours per window on the ground level, and more for upper floors. Homeowners weighing the two paths often start by comparing retrofit windows against a full tear-out.
| Factor | Insert (Pocket) Replacement | Full-Frame Replacement |
|---|---|---|
| Time per window | About 1 hour | 4 to 6 hours at ground level |
| Existing frame | Stays in place | Removed to the rough opening |
| Interior and exterior trim | Preserved | Removed and replaced |
| Frame condition required | Solid, square, no decay | Any condition, including rot |
| Glass area result | Slightly smaller than original | Full opening recovered |
| Size or style change | Limited to the existing opening | Size and style can change |
| New flashing and sill pan | Existing details remain | Installed fresh per ASTM E2112 |
Sources: Pella window installation guidance; Andersen DIY replacement window installation resources; Marvin insert and full-frame replacement guidance; ASTM International, ASTM E2112 Standard Practice for Installation of Exterior Windows, Doors and Skylights.
Do Replacement Windows Have a Nailing Flange?
True replacement windows do not have a nailing flange. A nailing flange marks a new construction window, not a replacement unit. A replacement unit arrives with clean side jambs that are pre-drilled for screws, and those holes usually sit behind a removable cover in the sash track.
The pre-drilled jamb is what allows the unit to be secured from inside the opening without touching the siding. A flanged unit works differently, because the flange has to be fastened to the wall sheathing under the cladding. Anyone who buys a flanged unit for a pocket job ends up cutting the flange off, which removes the anchoring the manufacturer designed and voids the installation instructions. We sort this out at the measuring visit, and we carry both true replacement units and new construction windows so the right unit shows up on install day.
Do You Have to Remove Interior Trim When Replacing Windows?
You do not have to remove interior trim when replacing windows with an insert unit. Insert replacement preserves the interior casing and only requires the interior stop moulding to come off. Full-frame replacement is the opposite, because the casing, the stops and the jamb all come out together.
The interior stop is the thin strip of wood that holds the old sash in its track. Removing that strip opens just enough room for the new unit to slide back to the exterior stop, and the strip goes back on afterward to hide the joint. Painted plaster walls and stained hardwood casing survive this method intact, which is the whole reason older homes with original millwork lean toward insert work.
Original millwork does add one wrinkle. Windows that were caulked and painted shut for decades need the paint line scored with a sharp blade before the stops come off, or the paint film tears the casing edge as the strip lifts. Scoring the line takes a minute per window and saves a repaint of the entire casing.
Are Replacement Windows Installed From the Inside or Outside of the House?
Replacement windows are installed from the inside of the house in most cases. Insert replacement units are set into the opening from inside and screwed through the side jambs, so the exterior wall is never opened. Outside installation is reserved for full-frame work and for openings where the interior finish must stay untouched.
Inside installation wins on most homes because the exterior wall is the harder surface to repair. A crew working from inside removes the interior stops, lifts out the old sash, sets the new unit against the exterior stops, and drives screws through the pre-drilled jambs into the old frame. The exterior stays sealed the entire time.
Full-frame work reverses that logic. Pulling a frame down to the rough opening means the exterior trim has to come off, and the new flashing has to be woven back into the wall from outside. That is why full-frame jobs run four to six hours per window while insert jobs run about one.
Can Replacement Windows Be Installed From the Outside?
Yes, replacement windows can be installed from the outside. Exterior installation is the right choice when the interior trim must stay untouched, when the old sash is easier to release from outside, or when the job is a full-frame replacement that needs new flashing woven into the wall.
Exterior work also helps on upper floors where the interior room is finished and the crew already has ladders or scaffolding staged. Releasing an old double-hung from outside is often the cleaner path too: cut the exterior stops, drop the upper sash halfway, raise the lower sash halfway, fold the old aluminum tracks around the sashes, and pull both out through the opening. Everything on the inside of the wall stays exactly as it was.
Do You Have to Remove Siding to Replace Windows?
You do not have to remove siding to replace windows with an insert unit, because the new window goes in from inside the existing frame. Siding only comes off for full-frame replacement, and how much comes off depends entirely on what your walls are clad in. The cladding decides the method more often than the window does.
Cladding behaves differently under a pry bar, so here is how each material shapes the call:
- Stucco. Cutting stucco to reach a nailing flange means saw work, patching and a color match that rarely blends. Stucco homes are strong candidates for insert work from the inside.
- Brick veneer. Brick cannot be removed and reset cleanly around an opening, so the window is worked from inside and the brick mould is sealed at the perimeter.
- Lap siding, vinyl or fiber cement. Individual courses lift and reset around an opening, which makes exterior full-frame work practical.
- Cedar shingle or shake. Individual shingles can be replaced, though weathered shingles will not match new ones, so many homeowners choose insert work to avoid the patchwork look.
- Aluminum-capped wood trim. Capping peels back and is often re-capped after the install, which contains any old paint left underneath.
How Do You Measure for Replacement Windows?
You measure for replacement windows by taking three width readings and three height readings inside the existing frame, then checking the opening for square and level. The unit gets ordered roughly one eighth of an inch under the smallest width reading and the smallest height reading. That eighth of an inch is the shim space that lets the window sit true in an opening that is never perfectly straight.
The three widths are taken at the top, the middle and the bottom of the frame. The three heights are taken at the left, the center and the right. Old openings settle unevenly, so those six numbers rarely match, and the smallest of each set is the only one that matters. Ordering to an average instead of the minimum produces a unit that will not go in.
Two more readings finish the visit. Wall depth tells us whether the new frame will land flush with the interior casing, and a square check across the diagonals tells us whether the opening can accept an insert at all. A frame that is out of square by more than the shim allowance is a full-frame job, no matter how good the wood looks. Choosing the right window sizing starts with those six numbers, not with a catalog.
Because the numbers drive the order, replacement windows are built to your openings rather than pulled off a shelf. Homeowners who want to see frame depth, sash operation and glass options in person before the order goes out are welcome at our showroom by appointment.
What Is a Rough Opening on a Window?
A rough opening is the framed hole in the wall structure that a window sits inside, formed by the header above, the king and jack studs on each side, and the rough sill below. The rough opening is the wall itself, not the window. A full-frame replacement returns to this surface; an insert replacement never reaches it.
Reaching the rough opening is what makes full-frame work more capable. Once the framing is exposed, the crew can repair a rotted sill, correct an opening that was framed out of square, add flashing where none existed, and recover the full glass area that decades of added frames had eaten away.
What Should You Do Before Installation Day?
Before installation day you should clear the work area at every window, inside and outside. Window coverings, hardware, furniture, wall art and exterior plantings all need to move before the crew arrives. Clearing takes an evening and it protects both the crew’s pace and your belongings.
Removal work produces fine dust that settles on anything within reach of the opening, so the prep list is short and specific:
- Take down blinds, shades, curtains and every mounting bracket
- Remove alarm sensors and window locks that were added after the original install
- Move furniture at least three feet back from each opening
- Take pictures, mirrors and shelving off the walls beside each window
- Clear a path from the driveway to each room the crew will work in
- Flag or move shrubs, planters and hoses under exterior openings
- Plan for pets and small children to be in a separate part of the house
Flagging plants matters more than it sounds. A dormant shrub under a window looks like dead landscaping to a crew carrying a sixty-pound unit, and a low branch near an opening breaks easily. Marking both takes two minutes. A full walkthrough of installation day prep covers the rest of the room-by-room details.
Do You Have to Remove Blinds When Replacing Windows?
Yes, you have to remove blinds when replacing windows. Blinds, shades and their mounting brackets sit directly in the path of the old sash coming out and the new unit going in. Brackets mounted inside the frame also block the interior stops the crew needs to lift.
Brackets are the part homeowners forget. A blind can be lifted off its brackets in seconds, but the brackets themselves are usually screwed into the casing or the jamb, and those screws have to come out too. Curtain rods mounted high on the wall above the casing can sometimes stay, though the fabric should always come down, because removal dust does not wash out of light-colored panels easily.
How Do Installers Remove an Old Window?
Installers remove an old window by protecting the floor, taking off the interior or exterior stops, releasing the sashes, and lifting the unit out of the opening. The old sash comes out in pieces, not as one assembly. Working in pieces keeps the surrounding casing and cladding intact.
Sash release depends on the window’s age and style. A wood double-hung has sash cords or chains that get cut, plus a parting bead between the two sashes that has to come out before the upper sash drops. An aluminum slider has a track and a stop screw. Older units with aluminum jamb liners let both sashes come out together once the liners are folded inward.
With the unit out, the opening gets vacuumed and inspected. We look at the sill first, then the lower corners of both jambs, because water that gets past an old window collects at the bottom and works sideways. Anything soft to a screwdriver tip is documented before the new unit goes anywhere near the opening.
What Happens If There Is Rot Around the Window?
If there is rot around the window, the damaged wood is cut out and replaced before the new unit is set. Rot repair happens the same day, in the same opening, and it changes the job from insert work to full-frame work when the frame itself is affected. A new window fastened into soft wood will loosen no matter how good the unit is.
Soft wood shows up in three places most often: the rough sill, the bottom six inches of each jack stud, and the exterior sill nosing. Repair means cutting back to sound material, splicing in new treated or primed stock, and re-establishing the drainage path so the next twenty years of water goes outward instead of sideways.
Finding rot is not a sign the job went wrong. It is the reason the old window came out one opening at a time instead of all at once, and correcting it in the open wall costs far less than discovering it after the trim goes back on.
How Do Lead-Safe Practices Change the Removal Process?
Lead-safe practices change the removal process by adding containment, wet methods and HEPA cleanup around every opening in a home built before 1978. The EPA Renovation, Repair and Painting Rule requires window replacement in pre-1978 housing to be performed by a Lead-Safe Certified firm, with no square-footage exemption. Most renovation work has a minimum threshold before the rule applies; window replacement has none.
Window replacement carries no threshold because sashes grind against jambs for decades and concentrate paint dust exactly where the crew will work. The U.S. Energy Information Administration counts 63.24 million American homes, roughly 48 percent of the housing stock, as built before 1980, and industry data derived from EPA findings puts the chance of lead paint in a pre-1940 home at about 87 percent. The federal action level is 1.0 milligram per square centimeter, and the rule has been in force since April 2010.
Newberg holds a large share of pre-1978 housing, so we treat containment as standard rather than optional. The sequence is plastic sheeting over the interior work area, the old unit removed with wet methods, a HEPA vacuum pass over every surface inside the containment, plastic removed and bagged, then a second vacuum and wipe of the room. All of that happens before the new unit is even lifted into the opening, and our EPA Lead-Safe certification is what allows us to perform the work at all.
How Is a Replacement Window Set and Secured?
A replacement window is set and secured by placing the unit in the opening, shimming it plumb, level and square, then driving screws through the pre-drilled side jambs into the existing frame. The unit is aligned first and fastened second, never the reverse. Fastening a unit that has not been aligned locks the error in permanently.
The set-and-secure stage follows this order on every opening:
- Dry-fit the unit in the opening and confirm the shim gap is even on all four sides
- Set the unit back against the exterior stops so the frame face lands where the trim will cover it
- Shim the sill first, working from the outside edge inward, until a level reads true across the full width
- Shim both side jambs at the fastener locations, checking plumb on each side
- Measure both diagonals and adjust until the two readings match, which confirms square
- Drive the jamb screws at the pre-drilled points, alternating sides and re-checking square after each pair
- Operate the sash and throw the lock before any sealing or insulating begins
Step seven is the one that separates a clean install from a callback. A sash that binds or a lock that will not throw is telling you the frame is out of square, and the fix at that moment is a shim adjustment. The fix after the foam cures is a full removal. Our crews carry AAMA InstallationMasters certification, and every window replacement we perform gets that operation check before the perimeter is closed up.
Why Do Installers Shim a Window?
Installers shim a window to hold the frame plumb, level and square inside an opening that is none of those things. Shims transfer the window’s weight to the structure at controlled points instead of letting the frame rest unevenly across a settled sill. Andersen describes shimming as the step that both squares the unit and spaces the frame off the rough sill.
Spacing the frame off the sill also gives water somewhere to go. A frame set flat into a puddle of caulk traps moisture against the wood below it, while a shimmed frame leaves a drainage path. Waterproof composite shims are used rather than wood shims for exactly that reason, because a wood shim in a wet sill becomes the next rot problem.
How Are Replacement Windows Fastened?
Replacement windows are fastened with screws driven through the side jambs into the existing frame or the rough opening framing. Screws are used rather than nails, because a screw can be backed off to correct alignment while a nail cannot. Fastener length has to reach solid framing rather than stopping in the old jamb liner.
Vinyl frames add one detail that gets missed constantly. A screw head driven flush against a multi-chamber vinyl jamb compresses the chamber wall and pulls the frame out of square, which is why the head is left standing slightly proud of the frame face instead of seated tight. The pre-drilled holes usually sit behind a snap-in cover in the sash track, and that cover goes back on to hide the heads once the unit passes its operation check.
Fastener placement follows the manufacturer’s instructions for the specific unit, because the anchoring pattern is what the warranty is written against. ASTM International notes in ASTM E2112 that fastener type and method depend on the window type, the wall construction, the anchoring material and the required embedment depth. No single pattern covers every opening.
How Are Replacement Windows Sealed and Insulated?
Replacement windows are sealed and insulated by air-sealing the perimeter gap, adding flashing that drains outward, and running a finish bead of sealant at the interior and exterior joints. Sealing is the stage that decides whether the window performs, because the gap around the frame is a straight path from inside to outside until it is closed.
The perimeter gap gets closed in layers. Backer rod goes in first on wider gaps to limit how deep the sealant sits, since a sealant bead that is too thick pulls away from one side as it cures. Low-expansion foam or fiberglass fills the remaining cavity. Then sealant bridges the joint between the frame and the opening, at the exterior first and the interior last.
Flashing is the layer homeowners never hear about and the one that matters most over twenty years. ASTM International maintains ASTM E2112, currently in its 2019 edition under ASTM Committee E06, as the U.S. standard practice for installing exterior windows, doors and skylights, and it recommends sill pan flashing under all windows and doors in low-rise residential construction. The principle is shingling: every layer overlaps the layer below it, so water always travels down and out rather than sideways into the wall. A sill pan is a waterproof tray at the bottom of the opening that catches anything getting past the frame and slopes it back to the exterior.
Shingling only works in one direction, which is why sequence is not negotiable on full-frame work. Flashing installed out of order will actively funnel water behind the water-resistive barrier instead of in front of it, and the wall stays wet long after the rain stops.
What Kind of Foam Is Used Around Replacement Windows?
Low-expansion window and door foam is used around replacement windows. Standard high-expansion polyurethane gap filler must never be used on a window perimeter, because it keeps growing after it is applied and bows the frame inward. A bowed frame binds the sash and can make the window inoperable.
A bowed vinyl frame is one of the most common self-inflicted install failures, and it is hard to reverse once the foam has cured hard. Low-expansion window and door foam is formulated to stop growing at a fixed volume and to stay slightly flexible, so it seals air without pushing on the jambs. Fiberglass insulation loosely stuffed into the cavity is the older alternative and still works, though it seals air less completely than foam.
Why Does Installation Quality Decide Window Performance?
Installation quality decides window performance because a window’s rating is measured in a laboratory frame, not in your wall. The perimeter seal and the squareness of the set determine how much of that rated performance actually reaches your energy bill. A high-performance unit installed loose performs like a cheap one.
The numbers behind that gap are large. The U.S. Department of Energy and Lawrence Berkeley National Laboratory put single-pane glass at R-1 and double-pane at R-2, against R-13 to R-30 for insulated walls, which makes the window the weakest thermal point in the building envelope before you add any air leakage at all. EPA ENERGY STAR reports that replacing single-pane windows with certified units saves $71 to $501 per year, a 7 to 15 percent reduction in annual energy bills, and those figures assume the units were installed correctly.
Rating targets also got harder. ENERGY STAR Version 7.0 took effect on October 23, 2023 and requires Northern climate zone windows to reach a U-factor of 0.22 or lower along with a solar heat gain coefficient of 0.17 or higher, tightened from 0.27 under Version 6.0. The Most Efficient 2025 tier sits at 0.20 or lower.
Oregon sits inside that Northern zone, and this region adds a second demand on top of the thermal one. Wind-driven rain through a long wet season loads the sill and the perimeter far harder than a dry climate does, so moisture management at the sill pan is not a detail we treat as optional here.
How Long Does It Take to Install Replacement Windows?
Installing replacement windows takes about one hour per window for insert work and four to six hours per window for full-frame work. A whole-house project on a typical home runs one to two days on site, while the full timeline from order to finish runs several weeks because the units are built to your measurements.
Those two clocks confuse more homeowners than any other part of the process. On-site time is short: Pella reports that a two-person crew can complete a typical eight to ten window home in a single day using pocket replacement, and the U.S. Department of Energy’s Residential Windows and Window Coverings report puts the average American household at nine windows, with single-hung the most common operator type. Manufacturing time is the longer clock, and it starts the day the final measurements are confirmed.
Site time stretches when conditions change. Upper-floor openings need ladder or scaffold setup, rot repair adds an hour or more per opening, and the first two windows of any older home always run slower than the last two while the crew learns how that house was built. Working with a certified installer is the difference between a slow first opening and a slow entire project.
How Do You Know a Window Was Installed Correctly?
You know a window was installed correctly by testing its operation and inspecting its sightlines before the crew leaves. A correctly installed window opens smoothly, locks without force, shows even reveal gaps on all four sides, and has a continuous sealant bead with no shrinkage. Every one of those checks is something you can do yourself.
Run the checks at each opening while the crew is still on site. Open and close the sash through its full travel, then throw and release the lock twice. Sight down each jamb from the corner to confirm the frame is straight rather than bowed. Look at the gap between the sash and the frame on all four sides, because an uneven gap means the unit is out of square. Run a finger along the interior sealant joint to confirm the bead is continuous and has not pulled away at the corners.
Sealant is worth a second look a week later. A bead applied too thin shrinks into the joint as it cures and leaves a visible gap, and a bead applied too heavy looks lumpy along the casing edge. Both are easy corrections in week one and awkward ones in month six. Knowing the markers of poor installation gives you the vocabulary to raise a concern early.
Is It Worth Replacing 20 Year Old Windows?
Replacing 20 year old windows is worth it when the seals have failed, the sash sticks, or the units are single-pane. Age alone is not the deciding factor; measurable failure is. A twenty-year-old unit that still seals, slides and locks may have years of service left, while one with condensation between the panes has already lost its insulating gas fill.
Three failures make the decision straightforward. Fog or moisture between the panes means the insulating glass seal has broken and the unit cannot be repaired. A sash that binds or a lock that will not engage points to a frame that has racked out of square. Visible daylight or a felt draft at the perimeter means the original seal has given up.
The financial case runs on two tracks. The 2025 Remodeling Cost vs. Value Report puts cost recouped at resale at 68.5 percent for vinyl window replacement and 61.2 percent for wood, and the energy side adds the ENERGY STAR range of $71 to $501 per year on single-pane replacements. Standards have also moved: a window that met ENERGY STAR Version 6.0 at a 0.27 U-factor no longer meets the current Northern zone threshold, so a twenty-year-old unit is two full specification generations behind. Homeowners who see two or more of the three failure markers usually find new windows pay back on comfort long before they pay back on paper.
Frequently Asked Questions
Can You Install Replacement Windows Yourself?
You can install replacement windows yourself on a straightforward ground-floor insert job, though the work is less forgiving than it looks. Measurement error, uncontrolled fastening and incorrect sealing are the three failures that produce drafts and leaks, and none of them is visible until the trim is back on. Andersen notes that a full-frame replacement requires at least four to six hours per window at ground level and more on upper floors, so scope matters as much as skill. We share design and installation guidance with DIY homeowners who want to handle their own project.
What Tools Do You Need to Install a Replacement Window?
The tools you need to install a replacement window are a tape measure, a level, waterproof shims, a power drill or driver, a caulk gun, a hammer, a screwdriver, a utility knife, a putty knife, a small pry bar and safety glasses. Andersen publishes that list as the standard set for most replacement projects, with product-specific additions noted in each unit’s installation guide. A second level and a long straightedge help on wide openings where a single reading will not tell you the whole story.
Do You Need a Permit to Replace Windows?
You often need a permit to replace windows, and the answer depends on your local building department and the scope of the work. Insert replacement into an unchanged opening is treated more simply than full-frame work that alters the opening size, adds an egress window, or touches structural framing. Because requirements are set locally rather than nationally, the reliable step is a call to the building department for your jurisdiction before the order is placed.
Can Windows Be Replaced in Winter?
Yes, windows can be replaced in winter. Crews work one opening at a time and close each one before moving on, so the house is never open at more than one point. Cold weather does affect sealant, since most exterior sealants have a minimum application temperature, and a crew working in winter selects a cold-weather formulation. Scheduling in fall or winter also tends to open up availability, because spring is the busiest season in this trade.
Do You Have to Replace All Your Windows at Once?
You do not have to replace all your windows at once. Phased replacement is common, and many homeowners start with the openings that fail first, which are usually the ones facing prevailing weather. Replacing everything in one project does produce a consistent appearance and a single installation timeline, while phasing spreads the work across seasons. Both approaches deliver the same performance per opening as long as each install is done to the same standard.
Do Replacement Windows Come With New Trim?
Replacement windows do not come with new trim on an insert installation, because the existing interior and exterior trim stays in place. Full-frame replacement is different, since the casing comes off with the old frame and new interior and exterior trim is installed as part of the job. Some exterior details are finished with metal capping rather than new wood, which contains any old paint left on the original trim and removes future repainting.
Does the House Stay Open During Window Replacement?
The house does not stay open during window replacement, because each opening is worked and closed before the next one is started. One opening is exposed at a time, typically for well under an hour on an insert job. Any opening that cannot be finished before the crew leaves for the day is closed and secured overnight, so the building envelope is never left open across a night or a weekend.
What It All Comes Down To
Replacement window installation is a seven-stage sequence carried out by one of two methods, and the condition of your existing frame picks the method for you. Insert replacement keeps the frame and trim and moves at about an hour per opening. Full-frame replacement returns to the rough opening, takes four to six hours per window, and is the right answer whenever there is rot, an out-of-square opening, or a size change on the table. Both methods live or die on the same two details: a unit set plumb, level and square, and a perimeter sealed and flashed so water drains outward.
Those details are also the reason installer credentials matter more in this trade than product brochures do. A window rated at a 0.22 U-factor only delivers 0.22 in your wall if the perimeter is closed correctly, and no factory rating survives a frame fastened out of square. Forty years of openings in this area is what taught us to check square twice before a single screw goes in, and it is the standard we hold at EnergyGuard Windows & Doors.
If you are weighing a window project on a Newberg home and want a straight read on which method your openings actually need, we are glad to take a look and walk you through what we find. Give us a call at (503) 554-5500 or set up a free consultation at a time that works for you.